Last Updated on May 18, 2026 by Team Digital Web Verse
Table of Contents
Starting a blog feels exciting… and a little overwhelming, right? I remember staring at my screen thinking, “Where do I even begin?” If that’s you right now — take a deep breath. You’re in the right place.
This WordPress Blog Setup guide is made for total beginners who want to launch their blog the right way — without feeling lost in a sea of tech jargon. I’ll walk you through each step I took when I started mine, using tools that are beginner-friendly, affordable, and don’t require a line of code.
Whether you’re setting up a blog to share your thoughts, grow a business, or make money online, this guide will help you go from idea to live site without the usual headaches.
By the end of this, your blog will be up and running — ready for the world to see.
Grab your coffee. Let’s do this.
What You Need Before You Start
Before we dive into the actual steps, here’s what you’ll need on hand:
- A blog idea or niche (not perfect? doesn’t matter — just start)
👉 Need help? Check out this post on blog niche ideas - A domain name (you’ll get this when signing up for hosting)
- A hosting plan (we’ll talk about this in a sec — I recommend HostGator*)
- Around 5–10 minutes of your time
- A drink of choice (coffee, tea, Red Bull… up to you)
Now that you’re ready for your WordPress blog setup, let’s walk through the essential steps to get your blog live and looking great.

Step-by-Step Instructions for a Smooth WordPress Blog Setup
Step 1: Choose and Register Your Domain Name
Your domain name is your blog’s home address — like yourblogname.com. And yeah, this part can be weirdly stressful for people.
If you’re stuck, here’s a quick crash course on how to pick a solid name:
- Keep it short and easy to spell
- Make it relevant to your blog’s topic
- Avoid hyphens and weird characters
- Try for a .com if possible
I’ve broken this down in more detail in this post on choosing the perfect blog name. Give it a peek if you want more guidance.
Now, once you’ve picked a name, you’ll need to register it. You can do this through hosting providers like:
- Namecheap (super affordable, good interface)
- HostGator (great if you’re grabbing hosting at the same time — which I recommend)
✨Tip: If you’re using HostGator (my go-to), they often bundle domain and hosting together for an easy setup.
✨✨Bonus: Get 65% off your hosting when you sign up through my special link — it’s a sweet deal to save you money right away!
Step 2: Get Hosting and Install WordPress
Hosting is the foundation of your WordPress blog setup — it’s like renting your spot on the internet where your blog will live. WordPress, the powerful software that runs your blog, will be installed on this hosting space. You need both for your blog to work.
For an easy and beginner-friendly WordPress blog setup, I recommend these hosting providers:
- HostGator — easy setup, good support
- Bluehost — also great for newbies, similar process
- NameCheap — a bit pricier, but solid performance
👉 Still undecided? Compare HostGator, Bluehost, and NameCheap in this in-depth hosting guide.
How to do it (with HostGator as an example):
- Head to HostGator’s website
- Pick the Hatchling Plan (plenty for new blogs)
- Choose your domain (or enter one you already own)
- Fill out your details & checkout
- Look for the “1-Click WordPress Install” option in your dashboard
- Boom — WordPress is now live
You’ll get a link to your WordPress dashboard (usually yourdomain.com/wp-admin). Bookmark this — it’s your control center for managing your WordPress blog setup.
👉 Sometimes, WordPress can restrict access due to user-level issues. Here’s a quick guide to fixing wp_user_level admin access problems.
💡 Looking to grow your blog faster this season?
The biggest Black Friday deals of the year are live!
Save up to 80% on hosting, SEO tools, and WordPress themes — all the essentials to start your blog.
👉 Grab the Best Black Friday Deals → Best Black Friday & Cyber Monday Deals (2025)
⏳ Updated daily as deals go live.
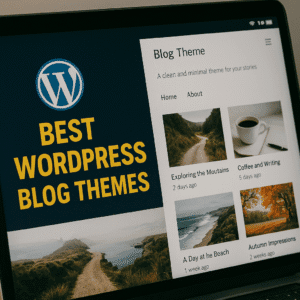
Step 3: Pick a WordPress Theme
Your theme controls how your blog looks — think of it as the clothes for your website. It’s a key part of your WordPress blog setup because a clean, attractive design keeps visitors engaged.
Free vs Premium:
- Free themes are fine to start (WordPress has thousands)
- Premium themes offer better design, support, and customization
Some beginner-friendly themes I love and recommend for your WordPress blog setup:
- Astra — fast, flexible, works with page builders
- Kadence — super customizable, lightweight
- GeneratePress — clean, SEO-friendly
👉 Want more options? Check out my full list of the best free & paid WordPress themes for bloggers.
How to Install a Theme:
- Go to your WordPress dashboard
- Click Appearance > Themes > Add New
- Search for your theme
- Click Install and then Activate
Done!
Step 4: Install Essential Plugins
Alright, now that your blog is looking decent with a theme, it’s time to give it some superpowers. That’s where plugins come in.
Plugins are little add-ons you can install to give your WordPress blog extra functionality. Want to make your site faster? There’s a plugin for that. Need SEO help? Got you covered. Think of them like apps on your phone — you don’t need all of them, just the useful ones.
So… which plugins should you actually install?
Here’s a solid starter pack I recommend to almost every beginner:
- Rank Math (or Yoast SEO) – Helps you write content that Google loves. It gives you tips like: “Use this keyword more” or “Make your title more engaging.” Super useful for beginners who want to rank in search.
- WP Super Cache – This plugin stores a static version of your site and serves that to visitors. Translation? Your blog loads way faster. And fast blogs = happy readers.
- Wordfence Security – Keeps hackers and bots out. Even if your blog is small, security is no joke. Wordfence gives you peace of mind without having to be a tech wizard.
- UpdraftPlus – Your blog is your baby, right? Backups are your insurance. If anything breaks, UpdraftPlus lets you restore your site in a couple of clicks.
- WPForms – Let readers get in touch with you easily. Whether it’s a question, a collab request, or just a kind thank-you, a contact form is a must.
To install any of these, go to your WordPress Dashboard → Plugins → Add New, search for the name, hit Install, then Activate. That’s it.
To enhance your WordPress blog setup, installing essential plugins is key for SEO, speed, security, backups, and user interaction.
💡 Don’t go overboard with plugins. Stick to essentials — too many can slow down your site or cause conflicts. Quality over quantity.
📌 Read more blogging essentials:
Step 5: Customize Your Blog Settings
Okay, this step is like setting up the backend of your blog — the behind-the-scenes stuff that shapes how your site works and feels. It’s tempting to skip over it, but trust me, spending 10 minutes here will make your life so much easier later.
Here’s what to tweak:
Site Title & Tagline
This is the first thing visitors (and Google) will see. Go to Settings > General and give your blog a clear title (like “Tech with Tim”) and a short tagline (like “Honest tech reviews & tutorials”).
Permalinks (Important for SEO)
WordPress defaults to weird URLs like yoursite.com/?p=123 — and that’s terrible for search engines. Fix this by going to Settings > Permalinks, and selecting “Post Name.” Now your links will look clean: yoursite.com/how-to-start-blog
Homepage Display
Do you want visitors to land on a homepage with a welcome message, or just see your latest blog posts? You can customize this by going to Settings > Reading. Choose “Your latest posts” if you want a classic blog roll, or set a custom page as your homepage if you’re building something more branded.
Site Logo & Favicon
Go to Appearance > Customize > Site Identity to upload a logo and favicon (that tiny icon in the browser tab). Even if you don’t have a professional logo yet, add something simple — it helps build trust and makes your blog look legit.
Timezone & Language
Tiny detail, but useful — especially for scheduling posts. Set your timezone under Settings > General, so your posts publish when you expect them to.
Step 6: Create Your Key Pages
Creating essential pages is also part of your WordPress blog setup. These pages help build trust and meet legal requirements. Before you even write your first blog post, let’s add the basic pages that every blog should have. These aren’t just for looks — they help you build credibility, improve SEO, and cover your legal bases (especially if you plan to earn money later).
Here’s what to include:
1. About Page
Tell people who you are and why you started this blog. What’s your story? What will readers get if they stick around? This doesn’t have to be super personal, but a bit of honesty goes a long way. You’d be surprised how many people visit About pages before deciding to subscribe or follow you.
You can write something like:
“Hey, I’m Sam — a full-time software dev and part-time blogger. I created this site to share everything I wish I knew when I started coding…”
2. Contact Page
This is where readers, brands, or potential partners can reach you. With the WPForms plugin (you installed that earlier, right?), you can create a contact form in under 2 minutes. Add a short message like:
“Have a question, feedback, or just want to say hi? Fill out the form below — I read every message!”
3. Privacy Policy + Terms of Use
Yep, even small blogs need this stuff. Not only does Google care, but you’re legally expected to have them if you collect any user data (even through something like Google Analytics).
Use a plugin like WP AutoTerms to generate these pages with minimal effort. It’ll guide you through adding your site name, whether you use cookies, etc.
4. Disclaimer Page (Optional but Recommended)
If you ever plan to use affiliate links, you need to disclose that — it’s not just best practice, it’s legally required in many countries (hello, FTC). A short disclaimer page like this works:
“Some of the links on this blog are affiliate links, which means I may earn a commission if you buy through them — at no extra cost to you.”
Simple, clear, done.
Step 7: Write and Publish Your First Blog Post
Finally, start creating content — this is where your WordPress blog setup turns into a living, breathing blog that readers love. This is the fun part!
You don’t need to overthink it. Just share something useful, honest, or personal — even if it’s short. Make it relatable. Talk like you would to a friend.
Need a step-by-step on this part? Here’s a guide to writing your first blog post that’ll walk you through it.
Before hitting “Publish,” set up:
- Categories: Group-related topics (e.g., “Travel Tips”)
- Tags: Use keywords, not random words
- Featured Image: Makes your post look good when shared
Once it’s ready, hit Publish and do a little dance. You’ve earned it.
Important: Tools can make or break your blogging experience — especially early on. I’ve put together a curated list of best blogging tools for beginners that helped me write faster, manage posts, and stay sane while growing my site.
FAQ: WordPress Blog Setup Basics
Is WordPress free to use?
Yes — the software itself is free. You just pay for hosting and domain (usually $30–$80/year total).
What’s the difference between WordPress.com and WordPress.org?
This guide is for WordPress.org (self-hosted). It gives you full control and flexibility. WordPress.com is more limited.
Can I change my theme later?
Yep. Anytime. Just be sure to back up your site in case something breaks.
Do I need to know code?
Nope. You can do everything visually with drag-and-drop builders and plugins.
How much does it cost to start?
Realistically? Around $50–$70 upfront. That’s it. Less than a dinner out with friends.
Final Thoughts: Your Blog Is Now Live!
Seriously, take a breath — you did it.
You just set up a fully functioning WordPress blog from scratch. No developers, no complicated tools, no drama. That’s a huge first step, and most people don’t even get this far.
What comes next?
- Write your first few posts.
- Set up Google Analytics & Search Console
- Look into affiliate marketing for beginners to monetize
And hey — if you hit any roadblocks, drop a comment or shoot me a message. You’re not alone in this journey.
Bonus: Want a free checklist?
Download the FREE WordPress Blog Setup Cheat Sheet (PDF) 🎁 — it covers everything from this post in one printable file. Perfect for tracking your progress as you build. 👇
Let me know how your setup goes!
And welcome to the world of blogging. You’re officially a blogger now.